I decided to make some ‘calm down’ bottles for my son. He has some wild emotions at times and we wanted to try and give him something calming to focus on when things get a bit much for him.

I called on the ever expanding knowledge trove that is YouTube and found a pile of home made vlogs on making the bottles, what ingredients to use and how to make them fun and unique. On the whole they were American in origin.
At first this didn’t bother me – how different could it be? Surely I can get similar ingredients in Australia and still have the same effect.
No. Not really!
The craft glue brands in Australia solidify when mixed with water, creating a gloopy jelly fish looking mass in the bottle. Looks cool, but not for the purposes of this activity! I was faced with the prospect of working my way through the various glues on the market or not making any bottles at all.
I scoured the web and found some other methods and basic ingredients and decided to experiment! My mum is here helping while my foot heals from surgery. Let’s just say she wasn’t thrilled at the prospect of me filling the kitchen she had just cleaned with glitter and glue.
So far I’ve managed to keep the explosive glitter mess to a minimum, and we seem to have found a method that works with Australian ingredients.
Sensory or Calm Down Bottles
Ingredients:
Clear plastic bottle
“Gloo” Glitter glue 120ml (in your choice of colour)
Warm water
Food colouring (in your choice of colours)
Super glue (suitable for bonding to plastic)
Method:
1. Squeeze about half of the bottle of glitter glue into the empty clear water bottle.
2. Top up the water bottle with warm water until almost full.
3. Add two or three drops of food colour to the water/glue mix.
4. Tightly screw the cap onto the water bottle and shake vigorously to mix the glue and the water.
– If the mixture seems clumpy, use a blender or stick mixer to whizz the mix together.
– The mixture will be very foamy after blending (more glue equals more foam) but this will settle after a while.

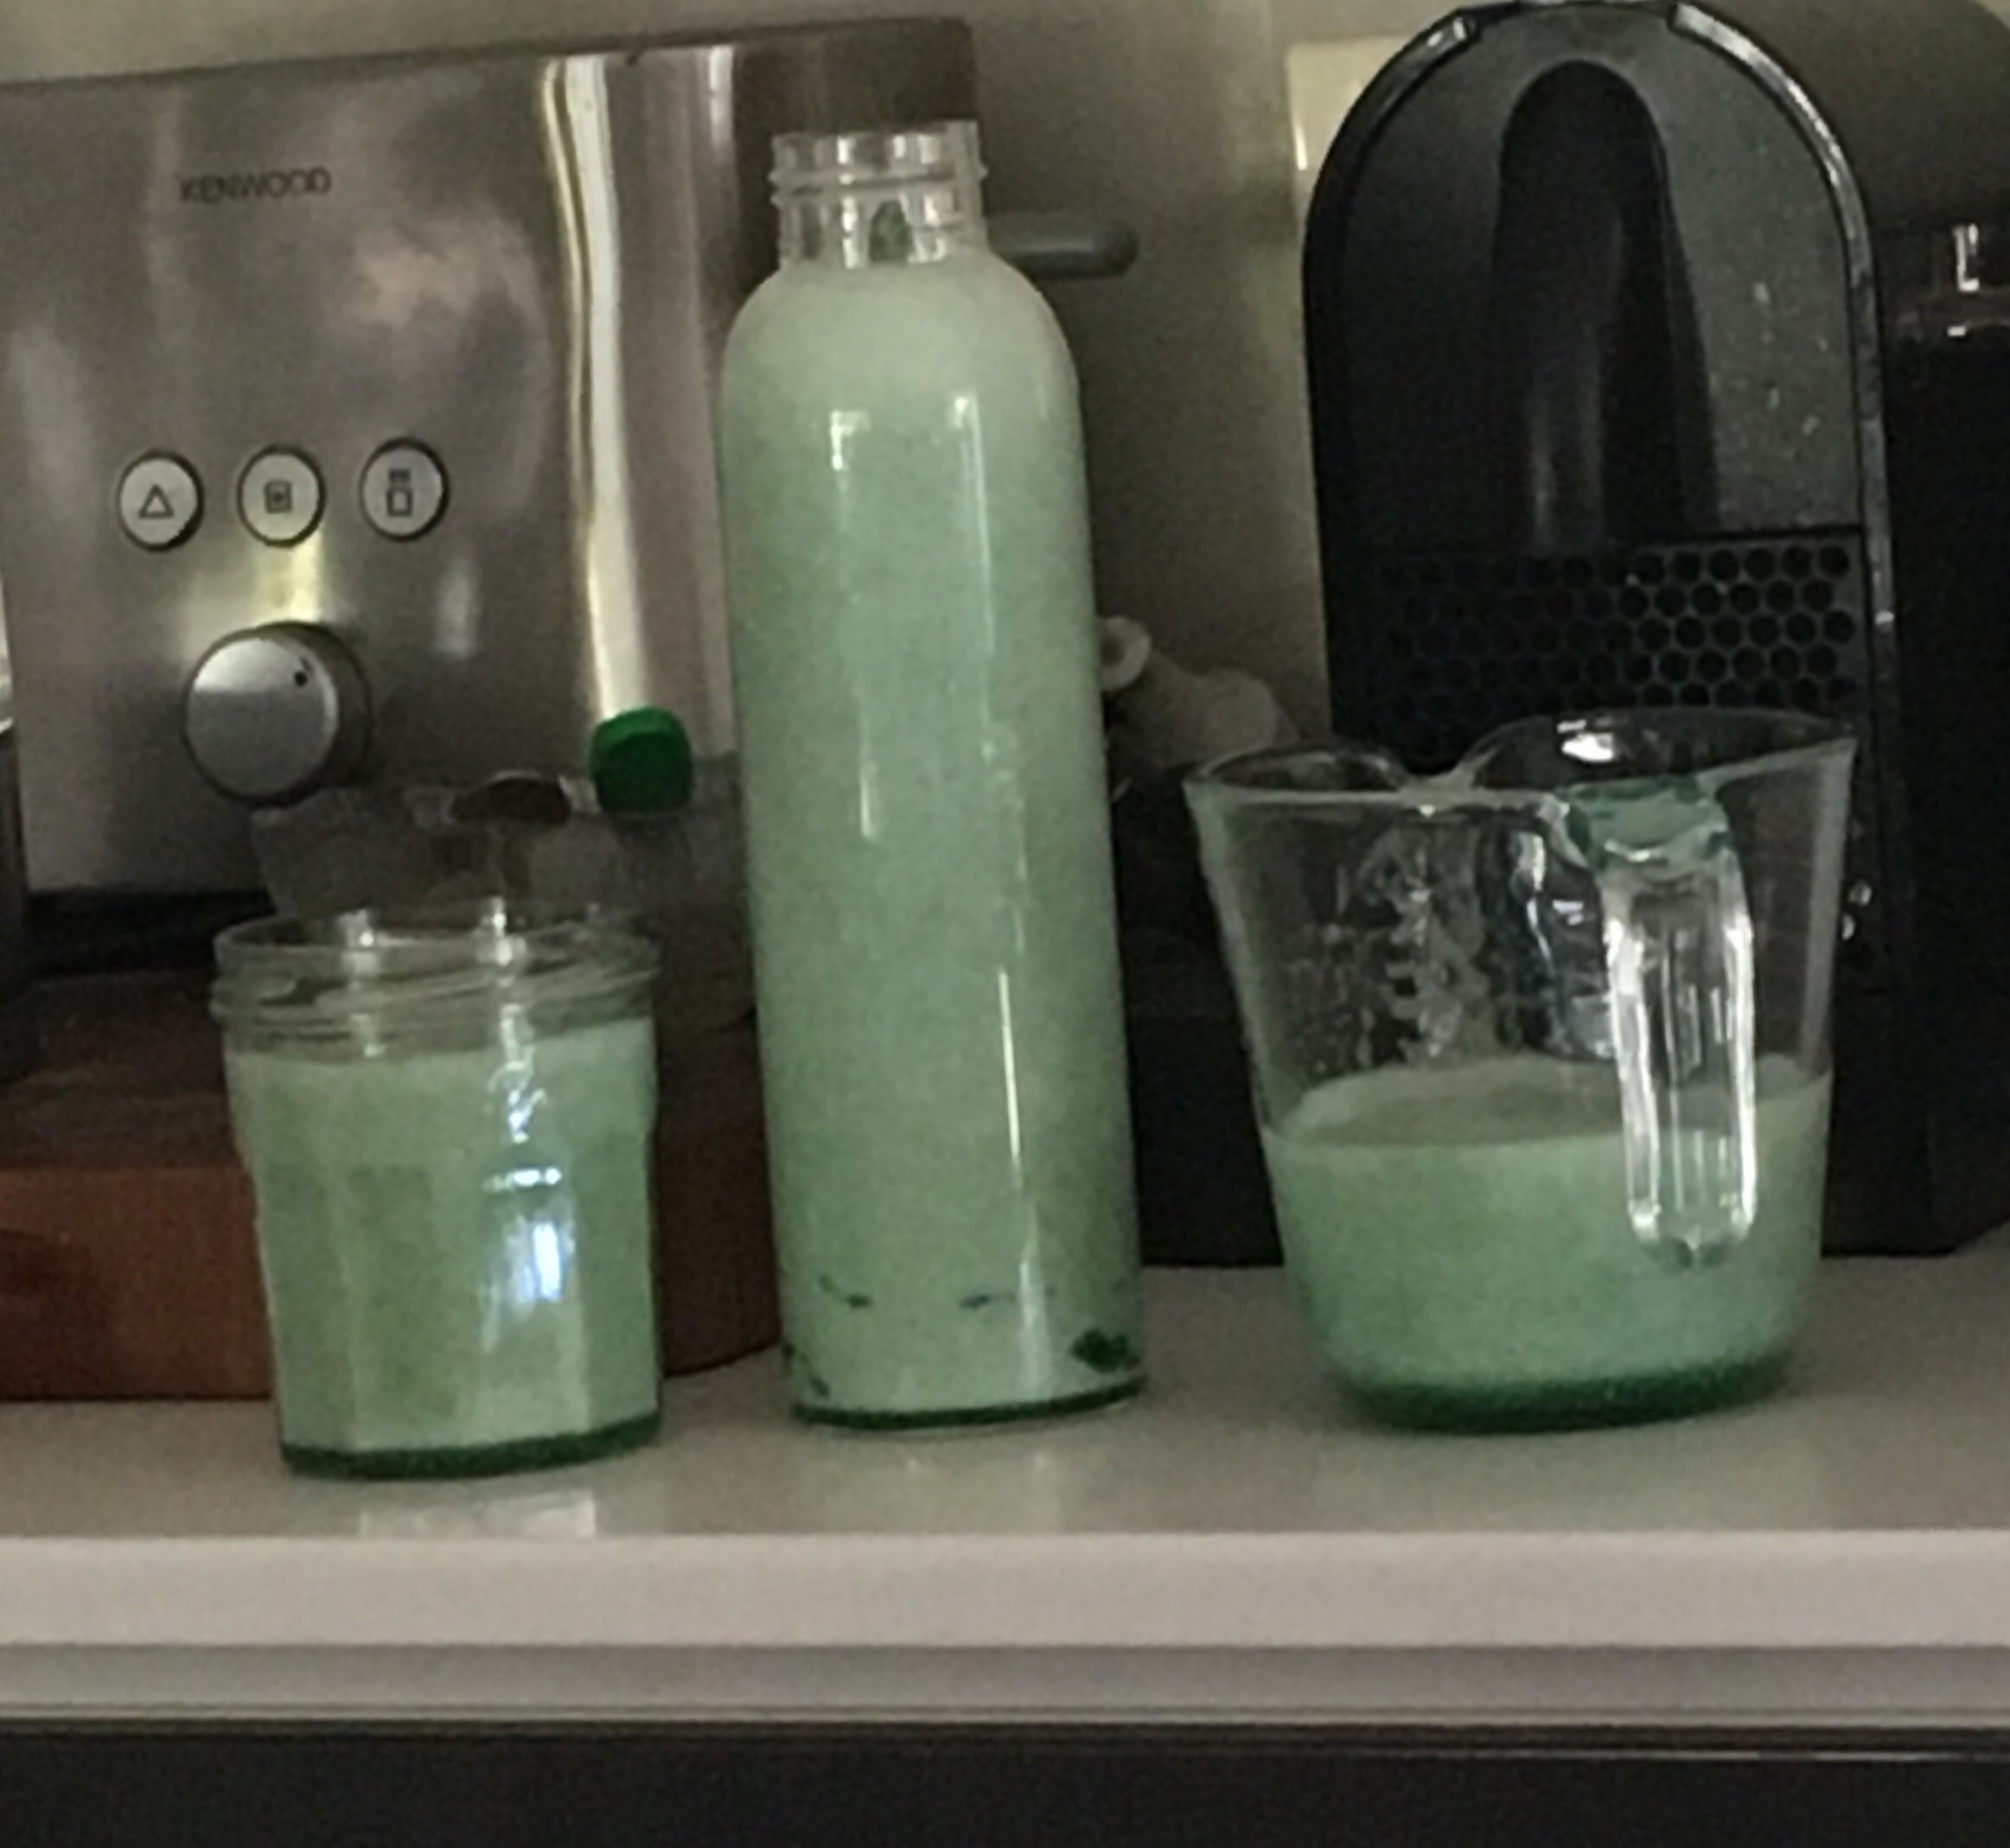
– Allow the foam to settle and return the combined mixture to the clear water bottle
– Make sure you leave a small amount of space at the top of the bottle neck for an air bubble. The air bubble will help disturb the glitter mixture when shaken.
5. If you would like to add extra glitter, small plastic toys or stars to the mix, now is the time! Keep experimenting with the combinations until you have one that gives the desired visual effect.
**if the mixture seems too thick, you can add extra water to dilute it.
6. When you are happy with the colour and consistency, apply super glue to the thread of the bottle neck and screw the lid on tightly.
7. Allow the super glue time to set before showing your little one the spectacular sparkly swirls in the bottle!
A shout out to my Mum, who helped source the materials and kept the kitchen a disaster free zone for most of this experiment!!
A note on the ingredients:
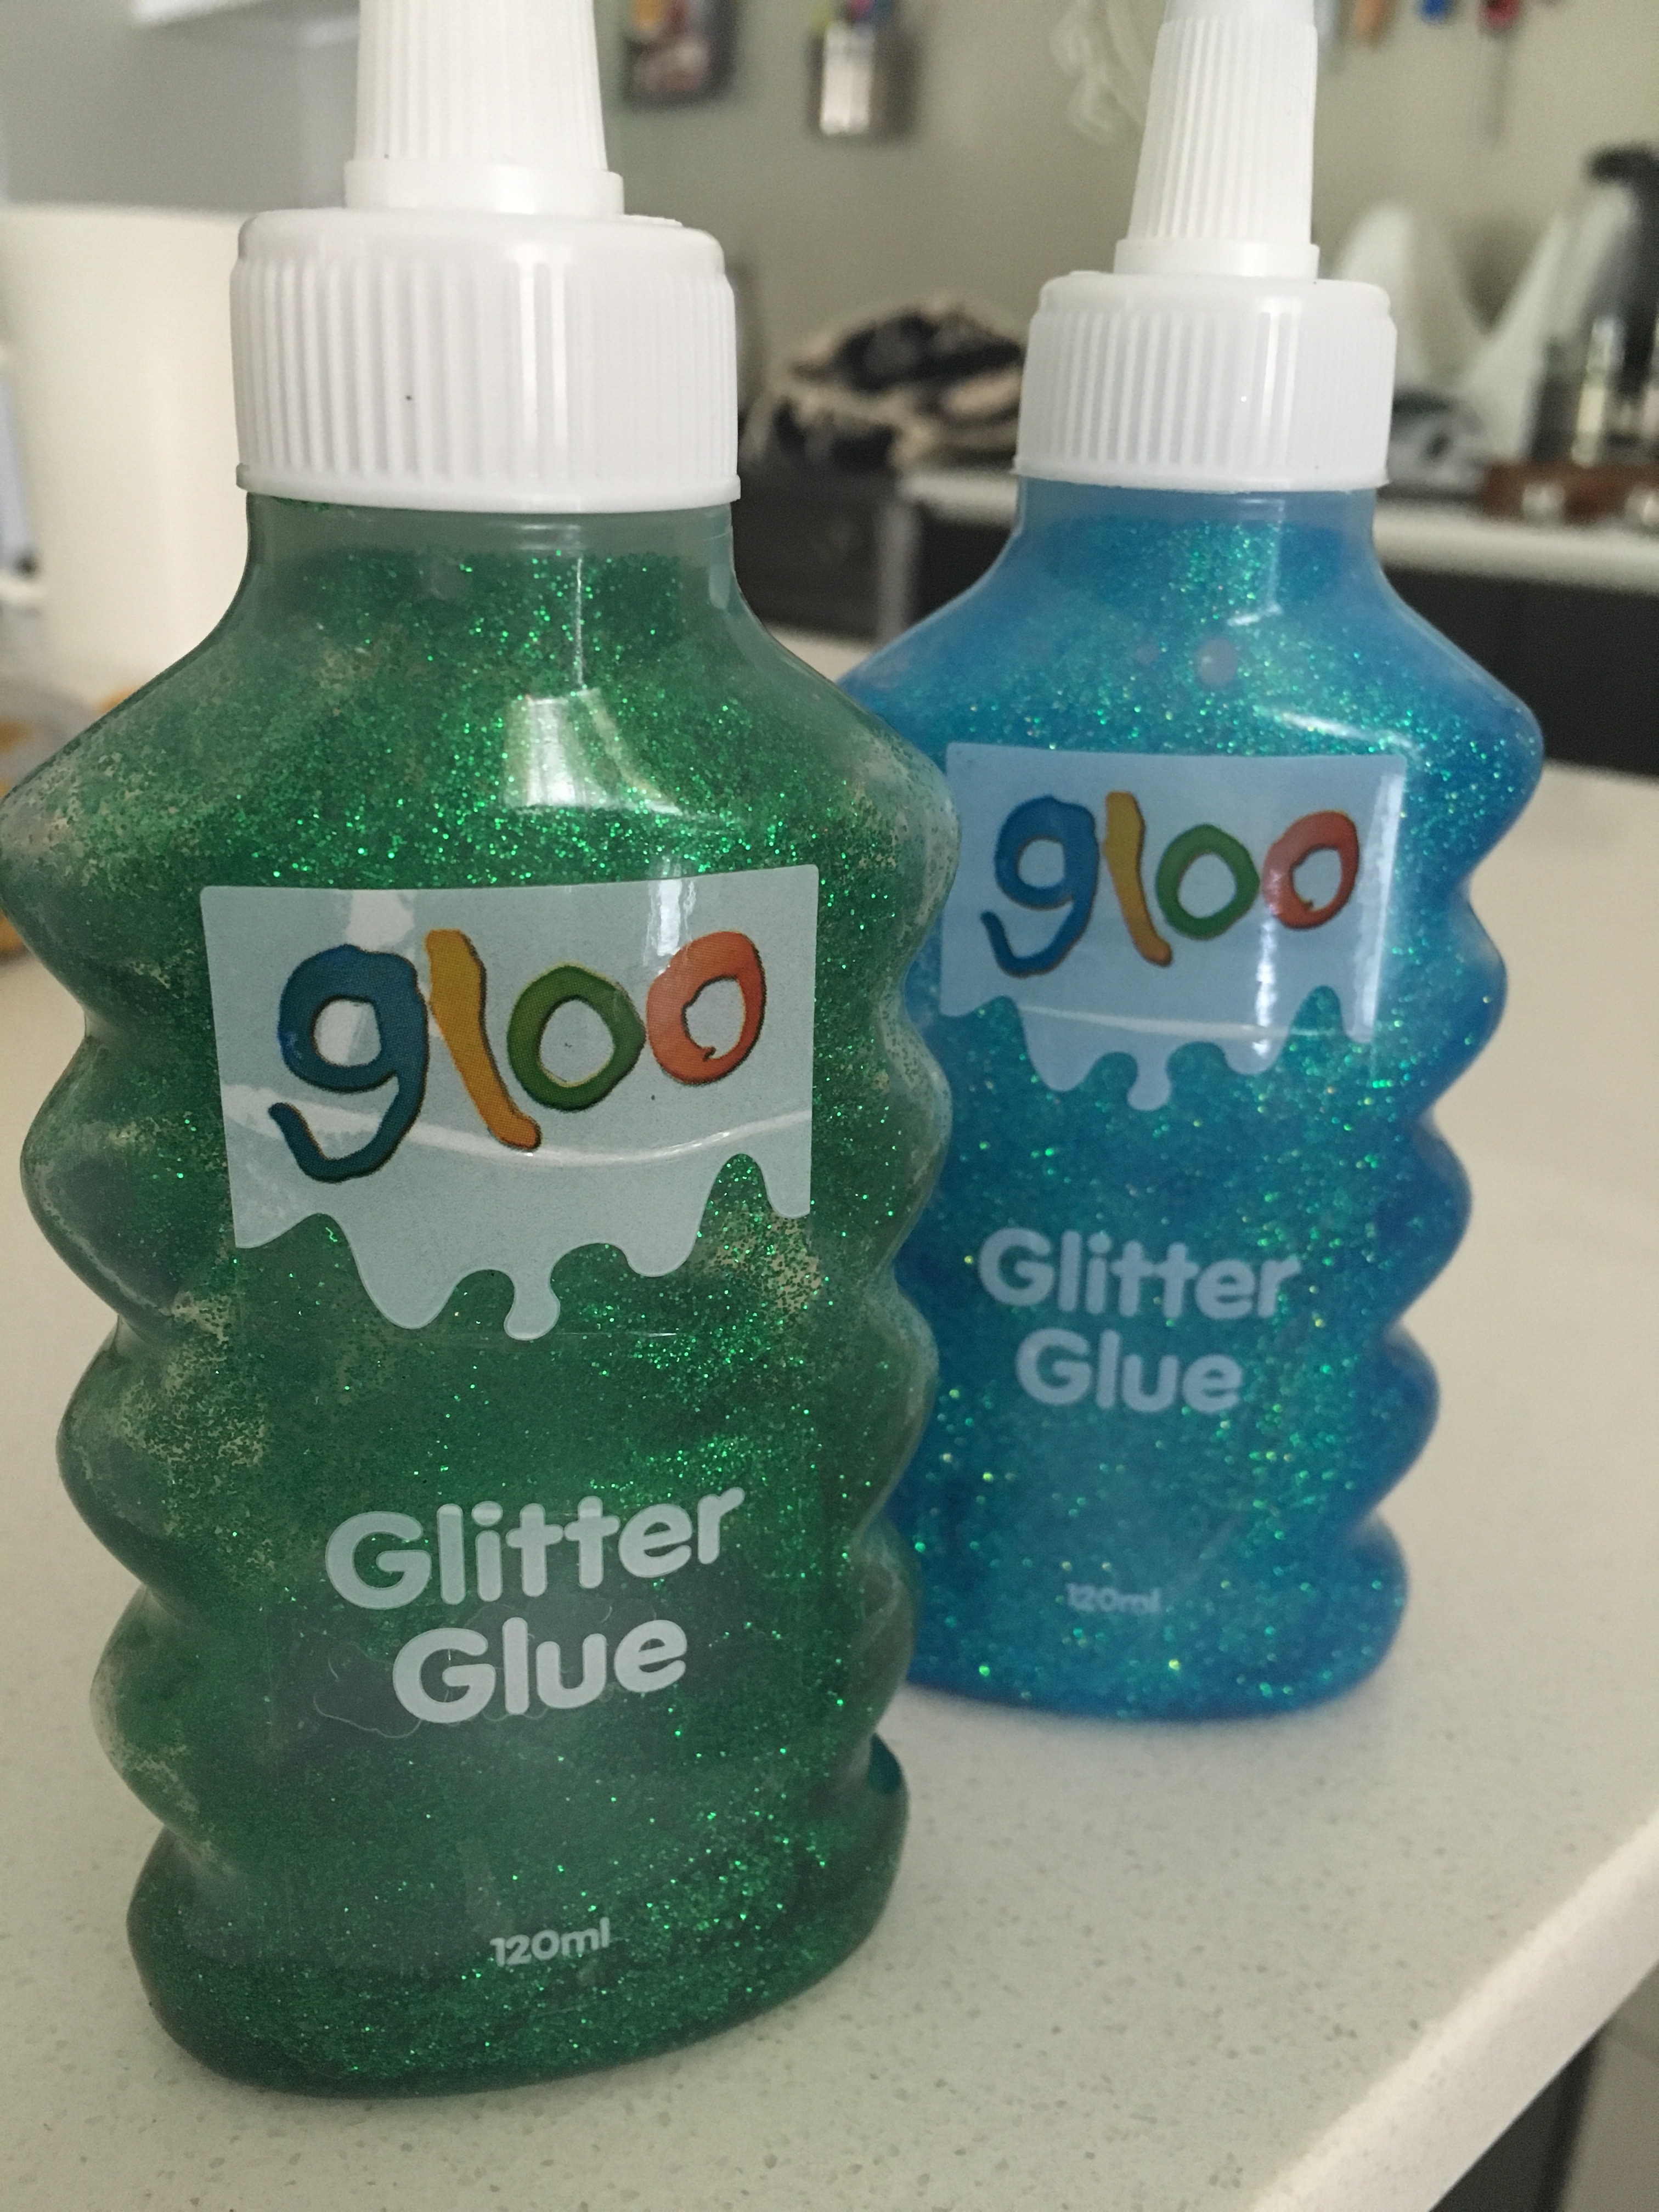
The glitter glue was purchased at Spotlight sewing and craft stores in Australia. If you don’t have a Spotlight store in your area, have a look online or at your local craft store for something similar. You may need to try different brands before you find one that works.
If you are making these bottles in the US, the most effective brand of glue seems to be Elmer’s Glitter Glue or Elmer’s Clear Craft Glue. US readers will also have access to the VOSS brand plastic bottles that are perfect for these.
(This post is not an advertisement for Spotlight, Gloo Glitter Glue or Elmer’s Glue. The author was not paid to produce this post. The author’s opinions are entirely her own. Anyone following the directions listed in this post do so at their own risk and are responsible for their own health and safety.)

Leave a comment